Alpkit Rig7 tarp first look and experiments

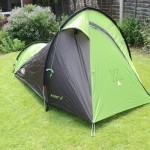
Although the Coleman Avior X2 Tent is great and I don’t have any complaints about it’s use, it is a bit heavy. I think it will be great for winter trips when I don’t mind carrying something that is going to keep me a bit warmer at night but for summer trips it’s over kill. I noticed that Alpkit had restocked there Rig 7 tarps so took the plunge. I have had it for a few weeks now but not had much chance to do anything with it. I had a spare evening last night and as I have no experience with tarps at all I thought it sensible to try out some set ups. The specs for the tarp are:
|
|
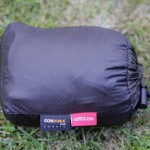
I started out with the stuff here to the right. The pegs are from the Coleman tent, as I have found them to be reliable and they are fairly light weight at 10g each. The guy lines are Lightwave Dyneema Guy Lines from Ultra Light Out Door Gear. They don’t absorb moisture, come with mini-Linelok adjuster and are only 5g each.
I won’t be using any poles so any set up is going to have to use the bike or the available scenery as supports. I tried out a couple of different set ups last night pictured below.
 This was my first attempt. I guess you might call it a lean to. This used 2 guy lines and 4 pegs. One guy line you can see in the picture with the other being on the blind side, lifting the middle of the shelter. It was OK but the gap available to lie in seemed pretty small for the size of tarp. This set up might work better if there was a convenient positioned wall to use on the right and side to raise up that side of the tarp. This would give a much larger shelter. This would mean you could peg the tarp down on the bike side so there would be less chance of the wind catching it. I wasn’t too happy with this one so I moved on.
The next set up I tried involved taking the front wheel off the bike and using that as a rear support. The main frame of the bike was used as a front support to create a porch of sorts. The handle bars give you the width and height for the head end while the front wheel gives you some height at the feet end. This only used 5 pegs and no guy lines but I think it windy conditions you would probably use a few more pegs down each side to keep the edges from flapping. Additionally I may want to put a guy line on either side of the bike frame to make it a bit solid and reduce the possibility of it falling over. A guy line from the edge of the tarp over the handle bars might be a good idea, to provide some tension down the length of the shelter, to stop the tarp slipping off the handle bars. I was really happy with this set up as it seems quite solid and gave plenty of space inside. It would be big enough for 2 people and some kit.
Time seemed to run out quite quickly so I only had a chance to try these 2 set ups. To be fair though I’m happy enough with the second one that unless someone more experienced points out to me what’s wrong with it or the terrain simply wouldn’t allow for it then I would just use that style of rigging it up.
The tarp itself seems well made. All of the rig points are attached to the material strongly and look like they will take some force to break. I think the only addition required is some loops of Dyneema to go in a few of the rig points to make it easier to hook the pegs and attach guy ropes.


One thought on “Alpkit Rig7 tarp first look and experiments”